Thursday, March 29, 2012
try lying on the ground
Saturday, April 23, 2011
D3s: notes on ISO for optimal image quality
2. Expose to the right (keep your exposure histogram pushed towards the highlights, but watch channel histograms to ensure that you do not blow out any channels; don't rely on luminosity histogram alone).
3. Increasing ISO is preferable to underexposing and correcting in post.
4. When using LO ISO values, underexpose slightly to avoid clipping highlights.
5. ISO 800, 1600 and 3200 are perfectly usable on a D3s, though dynamic range when using them is somewhat lower.
6. ISO 6400 introduces loss of color saturation and visible noise. Set High ISO NR to Low and lower sharpening in the Picture control to minimize noise. Avoid using high JPEG compression settings.
7. HI ISO should generally be avoided. Set High ISO NR to Low and no sharpening in the Picture Control; avoid high JPEG compression.
8. Decreasing shutter speed is preferable to increasing ISO when dealing with stationary subjects, but remember to use Long exp. NR to ensure noise-free images with 10-, 20-, or 30-second exposures.
Use Nikon Capture NX2 to convert noisy NEF images taken at high ISO to 16-bit TIFF. Open the file in Photoshop and convert to Lab Color. Use the Median filter (see Filter/Noise menu) to remove noise on the A and B channels. Do not sharpen until you like the result.
Wednesday, June 9, 2010
Learning to Scan Negatives II - How to use Levels in Photoshop
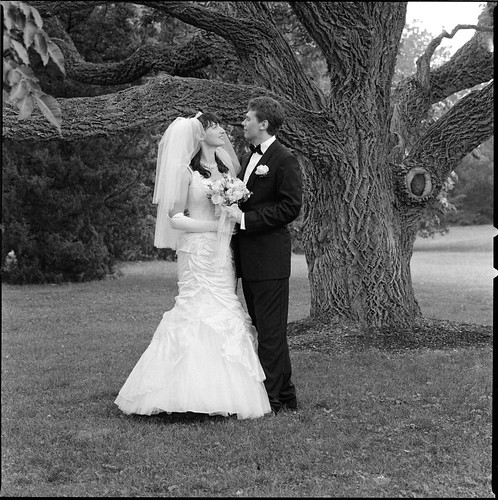
Special thank you goes to David Bivins for teaching me how to use Levels in Photoshop. I am really excited about this new technique.
I scanned the negative as outlined in part I, but after inversion all adjustments were performed in Levels, as follows:
- I clicked on Options in the Levels dialog box and set both Clip values to zero.
- I pressed down the Alt button (same as Option on a Mac) and started moving the white slider to set the whitest point in the image. I clipped the sky in the upper right, but preserved all highlight detail in the dress. (As you move the slider, you will see white areas. If you want to preserve detail in a particular area, make sure you leave it black.)
- Once the white point was set, I set the black point by holding Alt and moving the black slider. (The image will go white and you will see black areas showing clipping in the shadow areas. If you want to preserve detail, make sure the area remains white.)
- Then I moved the gray slider left and right and selected the most pleasing exposure.
- Clicked OK, scaled the photo down to 1200x1200 and saved it for web.
The previous version looks so flat compared to this one.
The photo was taken with a Hasselblad 500C/M and Zeiss Sonnar 150mm f/4 on Ilford HP5+ (EI 400). Developed in Ilfosol 3, 1+9 for 6 min and 30 sec at 20°C/68°F.
Saturday, June 5, 2010
Learning to Scan Negatives
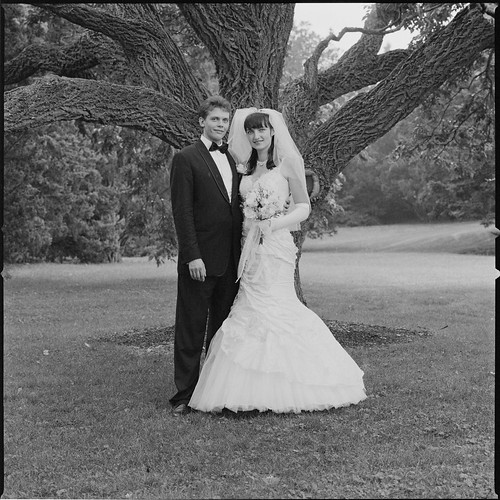
Finally got a chance to try out my new film scanner and found that scanning negatives is not as straightforward as I thought it would be. Please comment if you have any tips or suggested reading. I'd really appreciate it!
Below is my workflow so far.
I scanned the black and white negative as a positive in Grayscale mode using automatic focusing and exposure. Then I inverted the colors in Photoshop, adjusted the brightness and contrast sliders to increase the contrast while retaining (most of) highlight and shadow details, scaled the photo down to 1200x1200 and saved it for web.
Nikon Scan 4 settings:
Scale: 100%
Resolution: 4,000 pixels/inch
Curves: Off
Color Balance: Off
Unsharp Mask: Off
LCH Editor: Off
Analog Gain: Neutral
Digital ROC: Neutral
Digital GEM: Neutral
Digital ICE: Off
Digital DEE: Neutral
SIEnhancer: Neutral
Multi Sample Scanning: Fine (4x)
Bit Depth: 16
I initially tried scanning negatives as negatives, but found the result too contrasty with loss of texture in lightest and darkest areas.
The photo was taken with a Hasselblad 500C/M and Zeiss Sonnar 150mm f/4 on Ilford HP5+ (EI 400). Developed in Ilfosol 3, 1+9 for 6 min and 30 sec at 20°C/68°F.
UPDATE: I learned how to use Levels.
Monday, May 31, 2010
Rose Garden Photoshoot
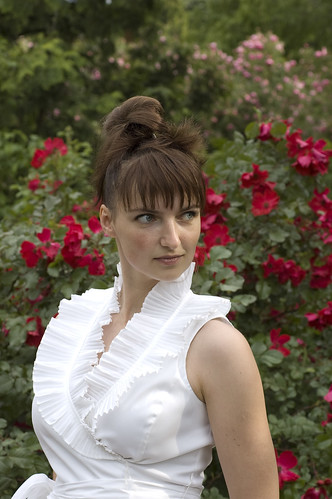
From today's photoshoot at the Botanical Garden. Looking forward to developing the black and white rolls I shot with my Hasselblad.
Sunday, May 23, 2010
Flower Shop
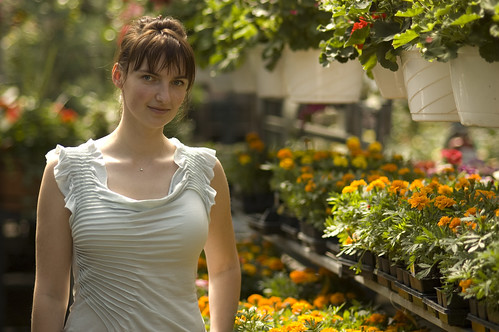
Don't be afraid to blow out the highlights!
I rarely doubt my exposure when I shoot film. With digital, however, you get to review the picture, so you know right away if it looks too dark or too light. You can even look at a histogram (a graph that shows tonal distribution) to be sure the photo is properly exposed. My camera also has a highlight feature that makes blown out areas blink.
I am still learning to read the little screen on the back of the camera in terms of being able to correlate what I see there to what the picture would look like on a computer monitor. When I took this picture and it came up on the little screen, the shoulder area was blinking, indicating overexposure and loss of detail. I upped my shutter speed to make the blinking go away, but the result was too dark. I like the original, and come to think of it, it makes sense that the highlights should be blown. The difference in brightness is too great.
I will try to ignore the blinking from now on.
